Python加速的技巧有很多,这篇文章总结了24个,查缺补漏,每天学会一个新的小技巧
一、分析代码运行时间
第1式:测算代码运行时间


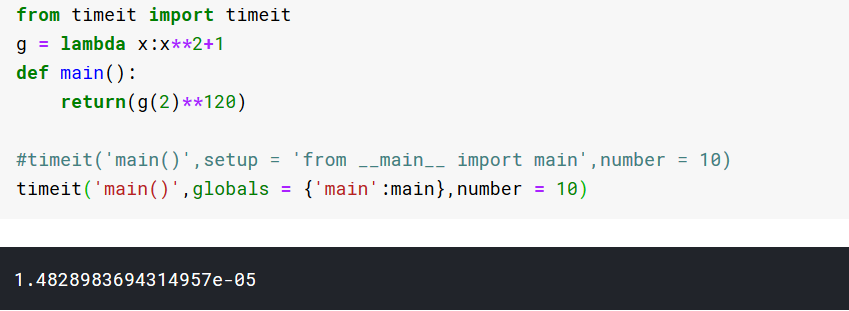


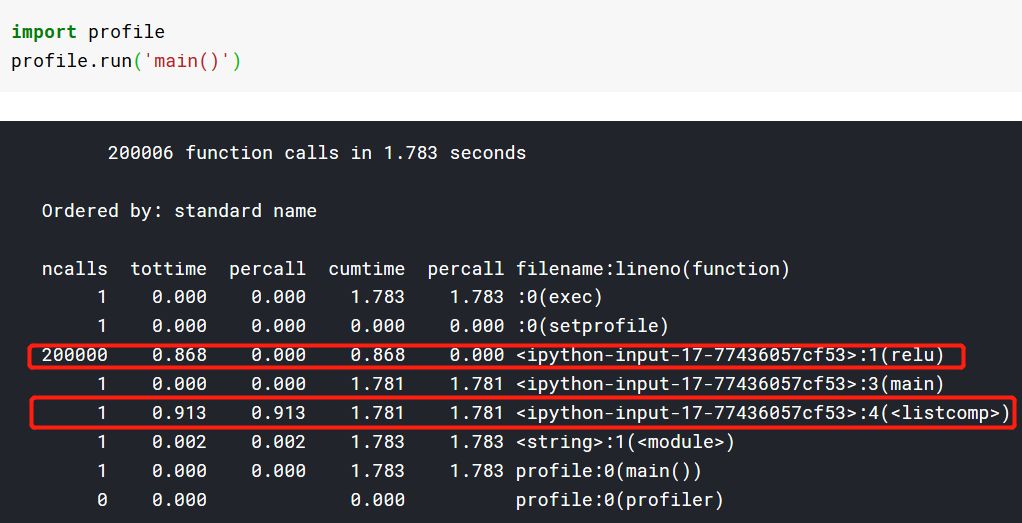
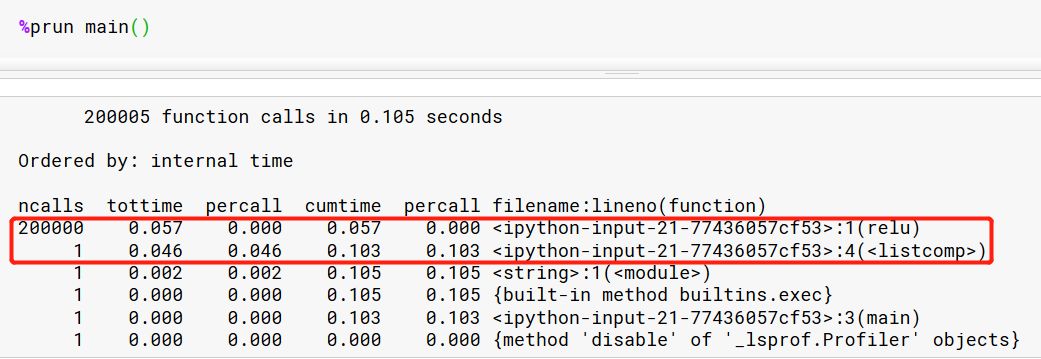


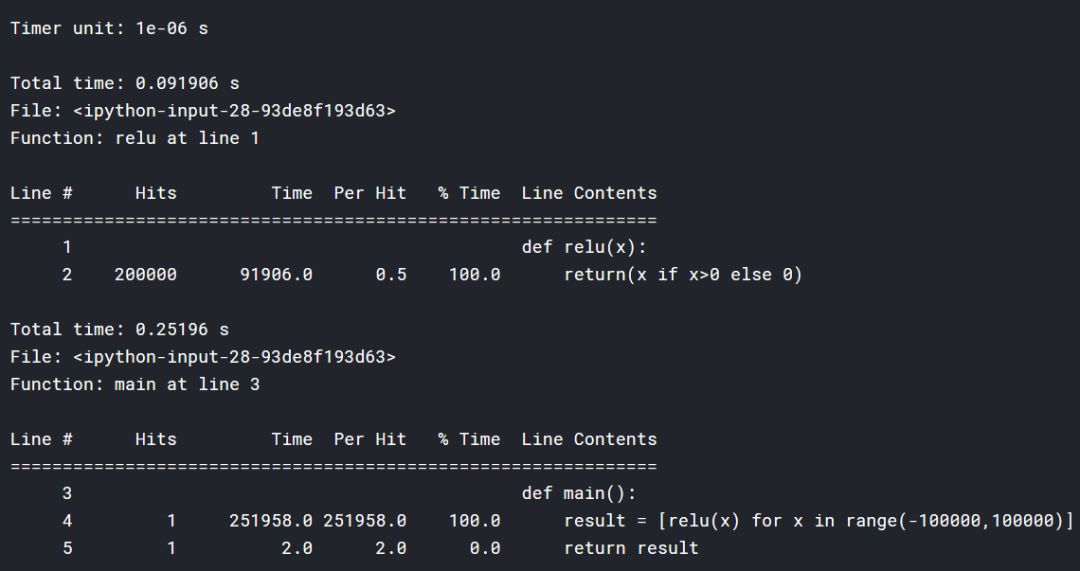

二、加速你的查找


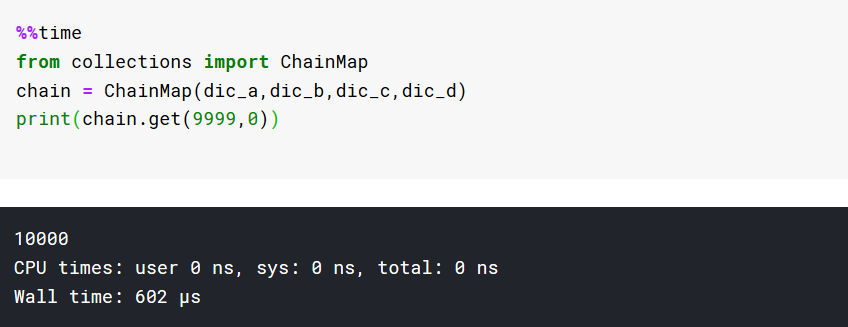
三、加速你的循环
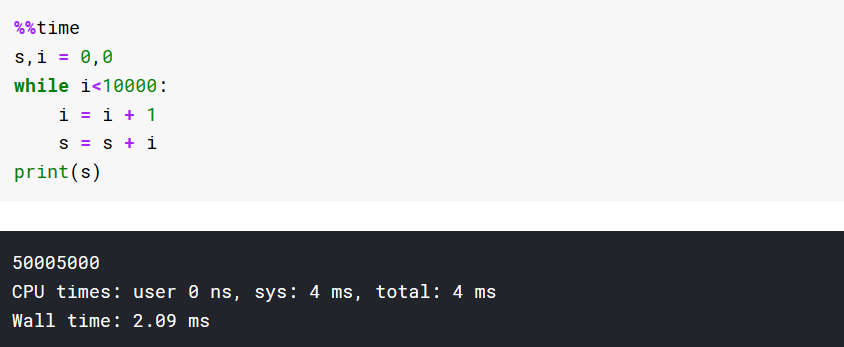
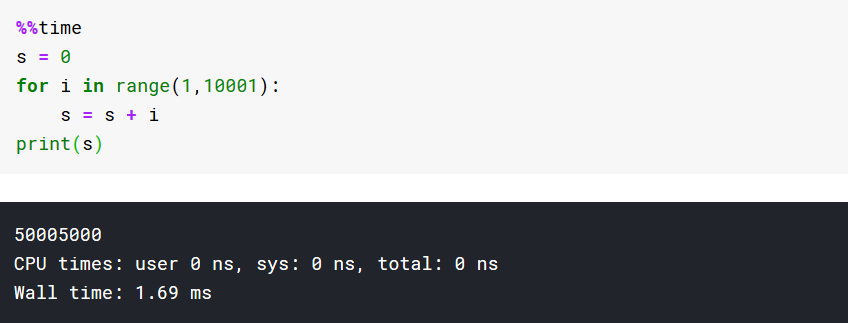
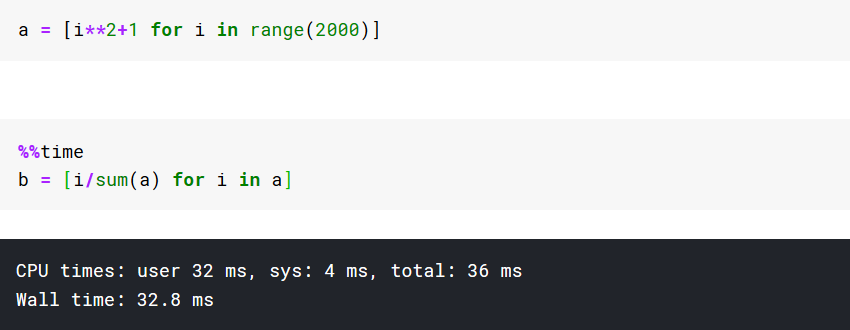

四、加速你的函数
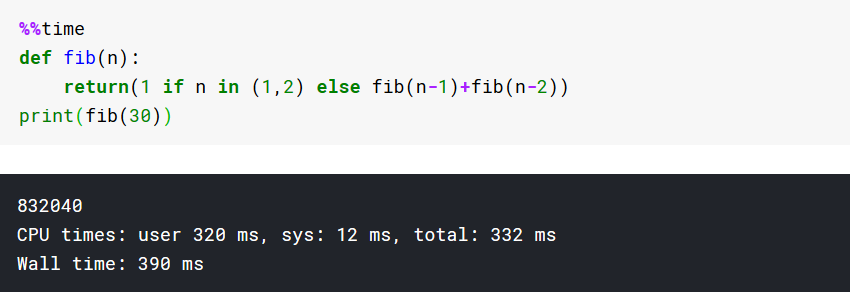
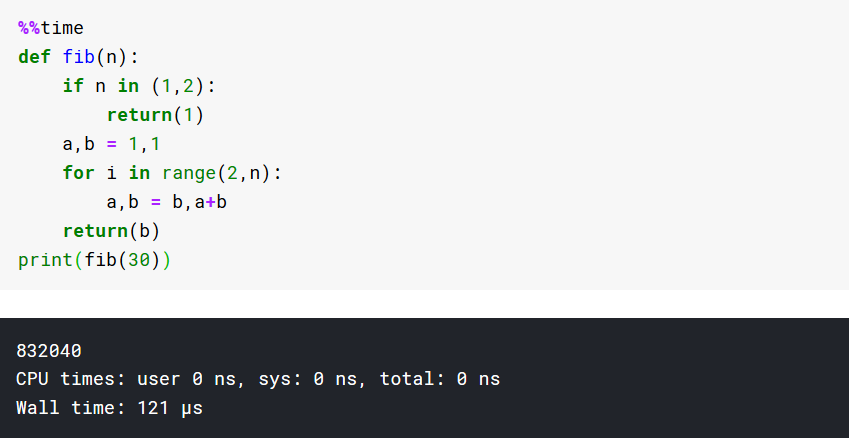
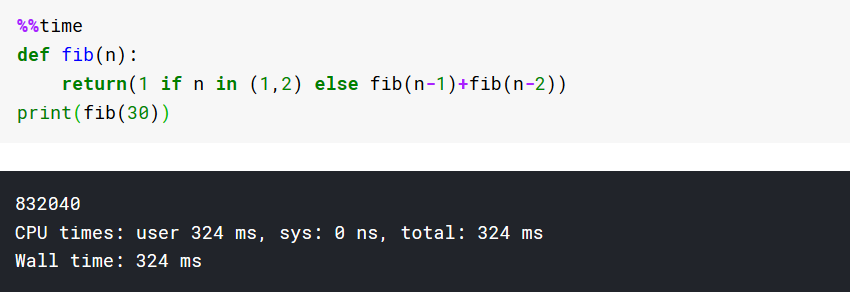
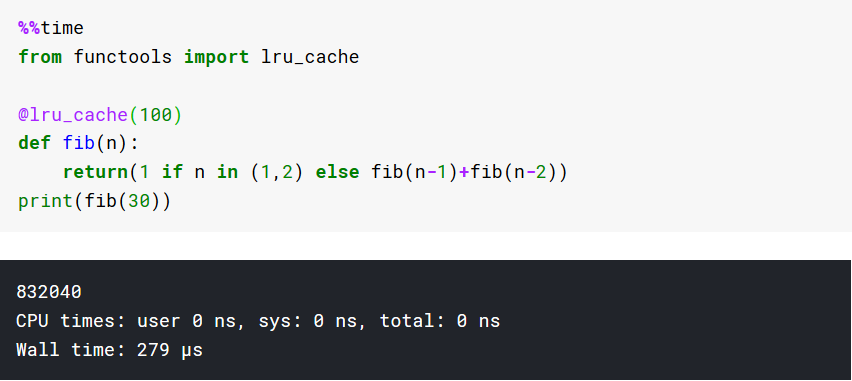
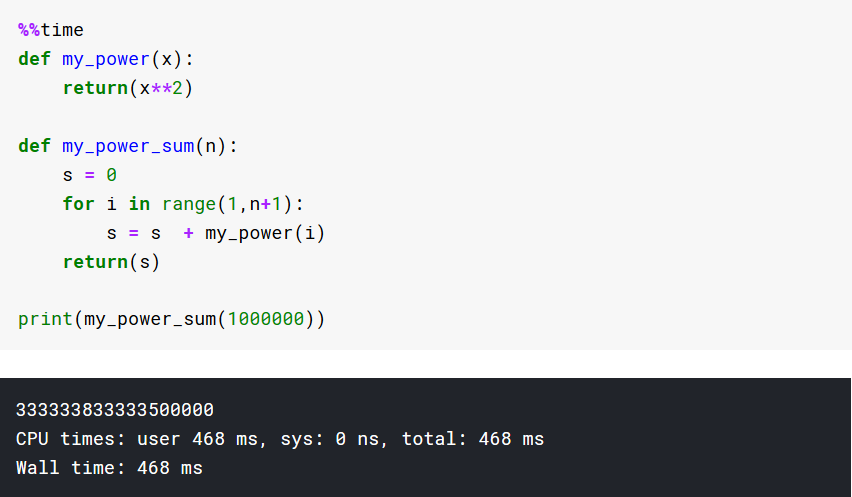
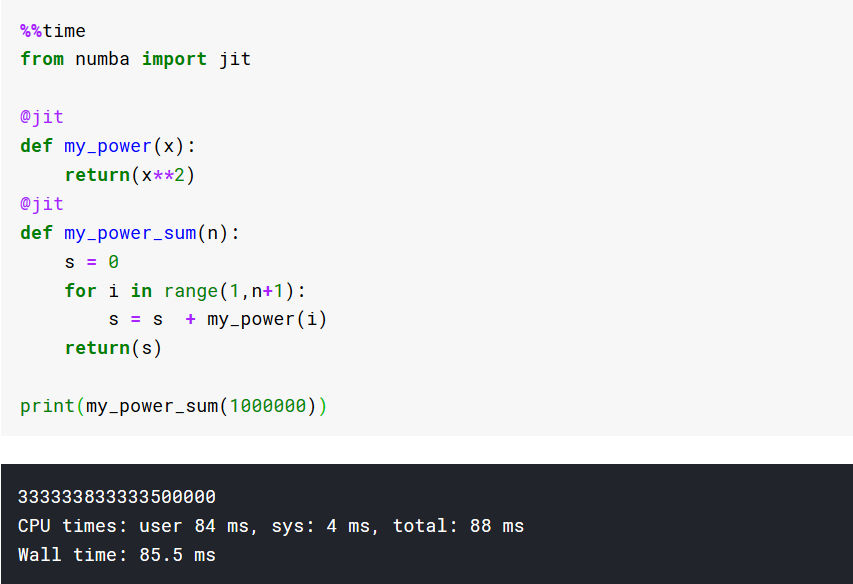
五、使用标准库函数进行加速
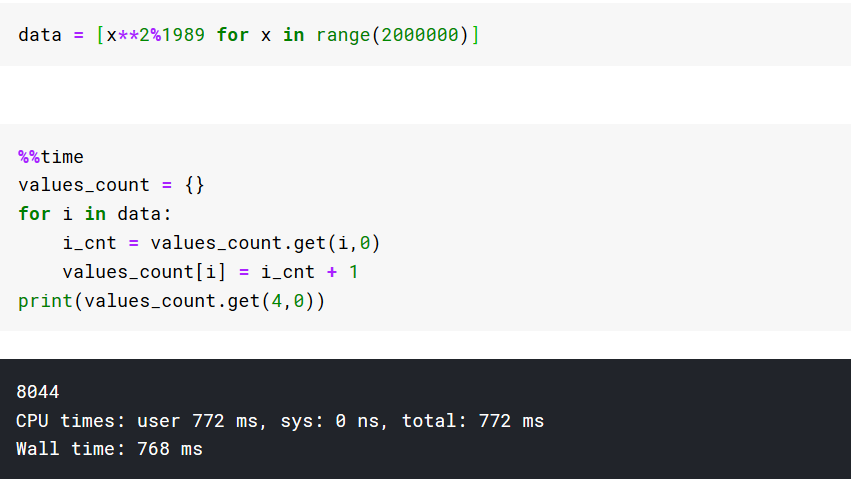
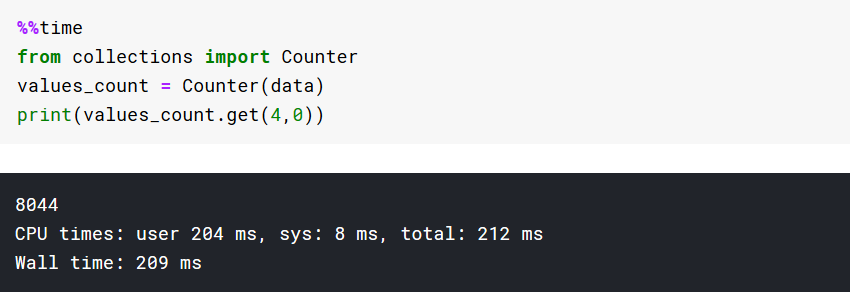

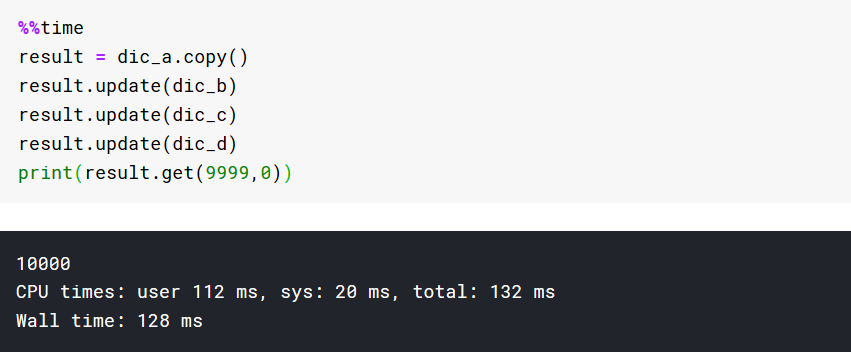
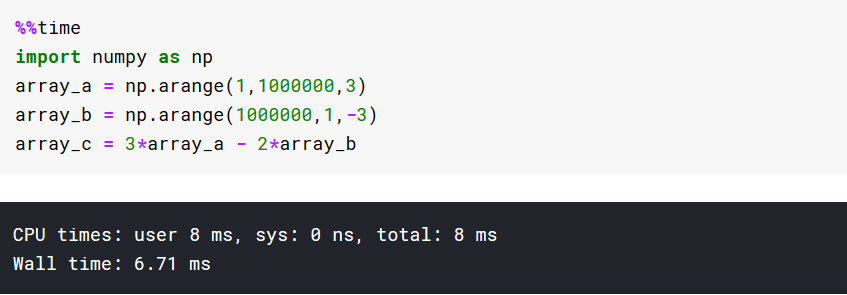
六,使用numpy向量化进行加速



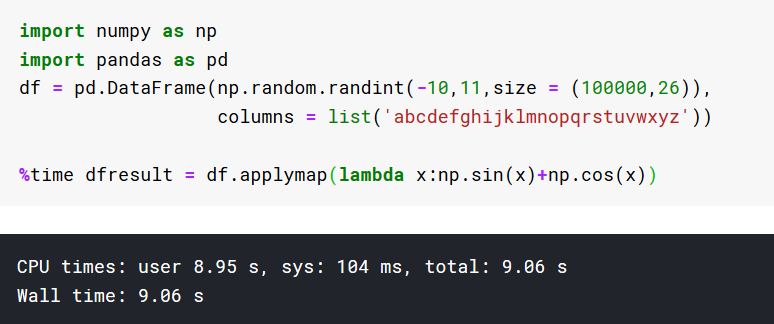
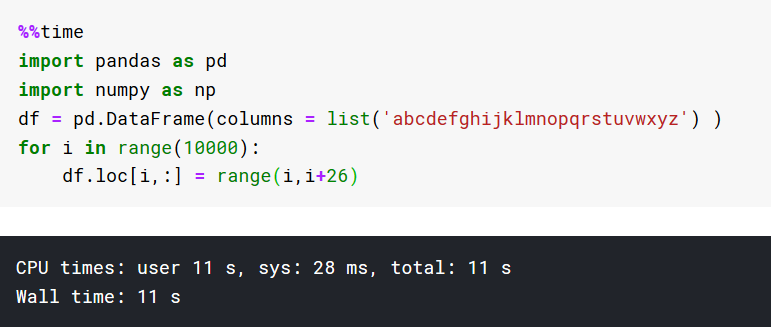
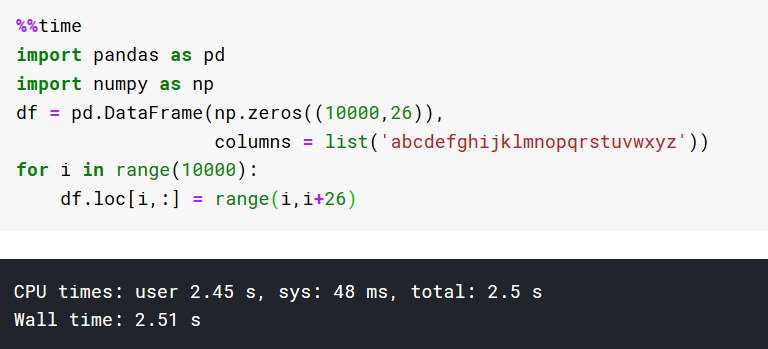
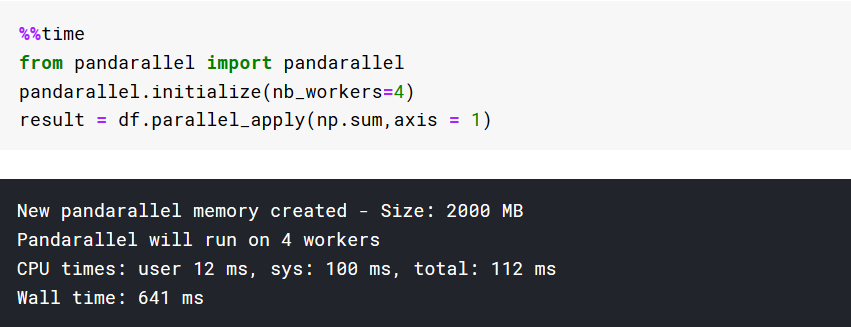
七、加速你的Pandas



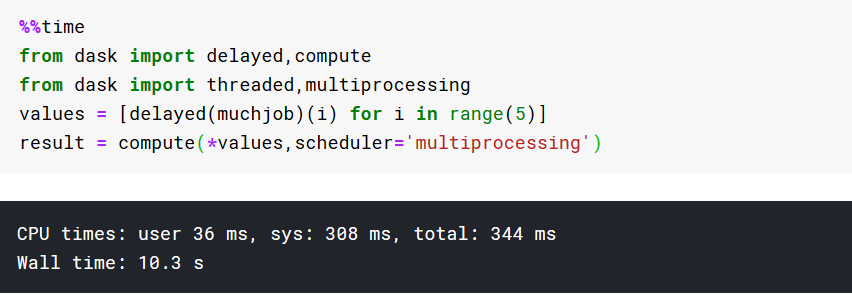
八、使用Dask进行加速


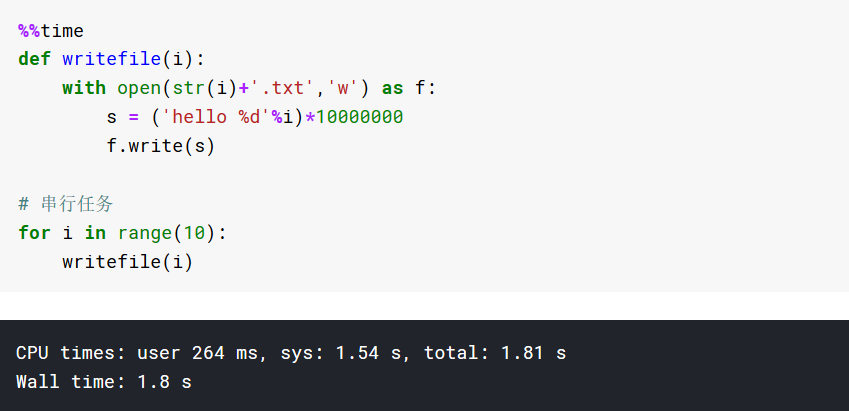
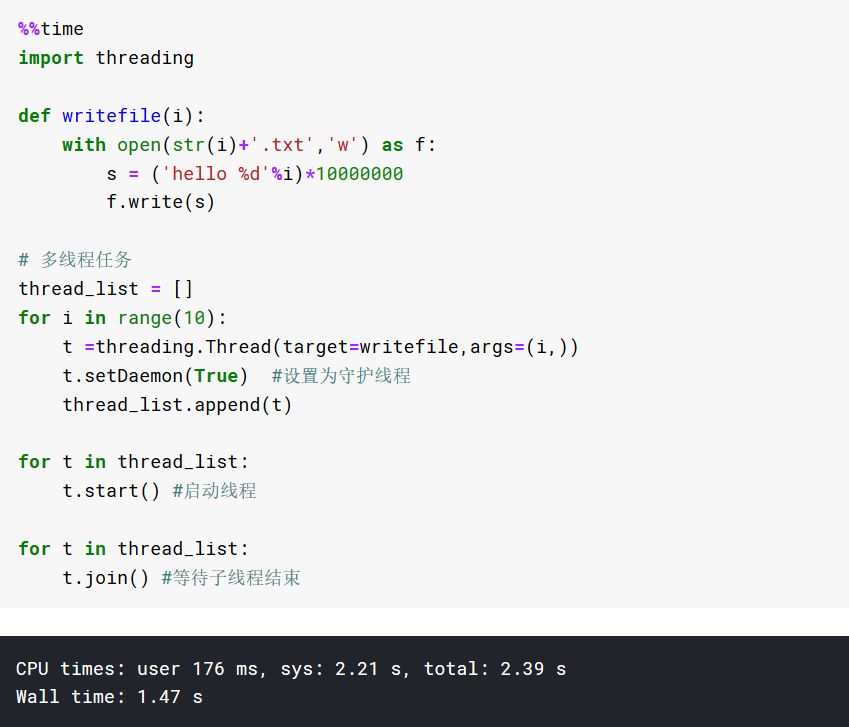
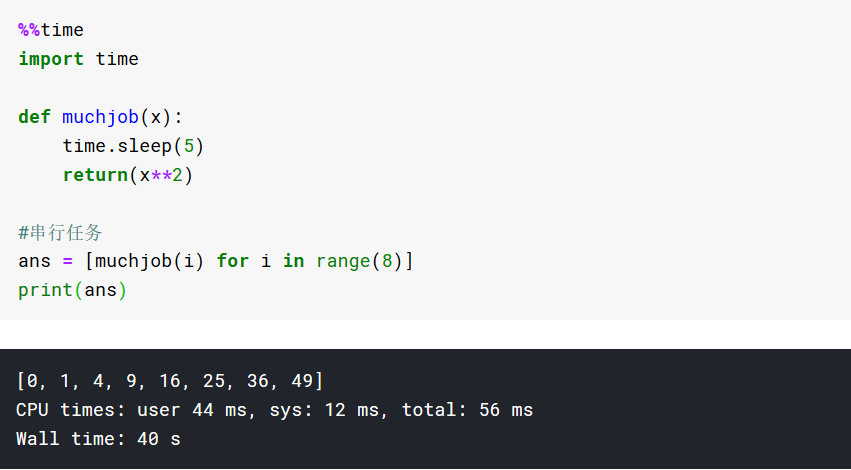
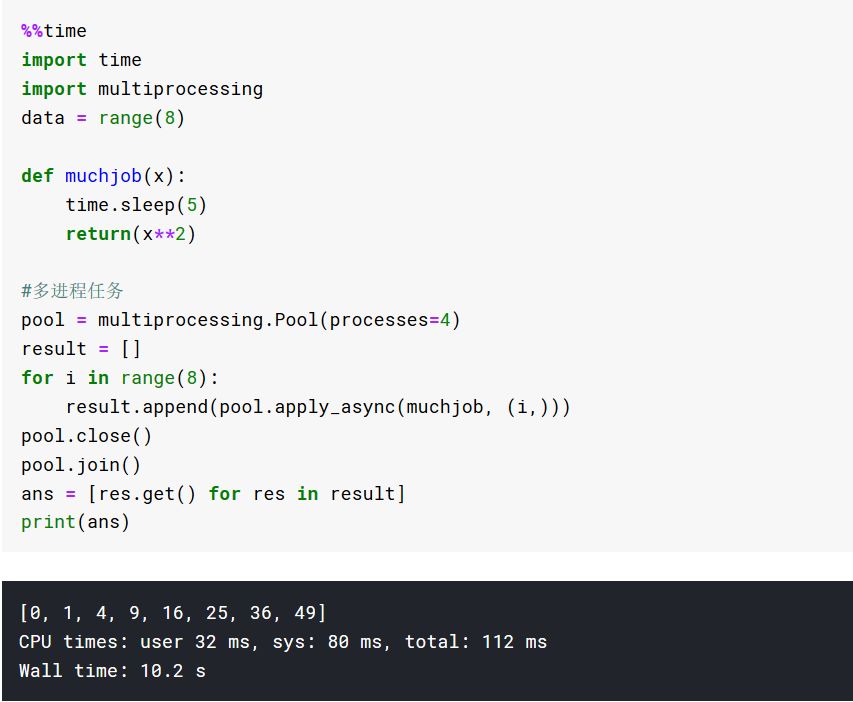
九、应用多线程多进程加速
分享个人经验,保留阅读记录,做时间的朋友
Python加速的技巧有很多,这篇文章总结了24个,查缺补漏,每天学会一个新的小技巧


django-extensions给django开发者提供了许多便捷的扩展工具(extensions),在github上高达5000颗星。小编我今天就介绍它包含哪些奥利给的有用扩展以及它们的使用场景。

django-extensions的安装
使用pip安装:
$ pip install django-extensions然后把其加入settings.py的INSTALLED_APPS:
INSTALLED_APPS = [...'django_extensions',]
django-extensions提供了哪几种扩展?
django-extensions主要提供了三种扩展:命令扩展,字段扩展和模型扩展。我们接下来分别介绍。
命令扩展
shell_plus
每次进行Django项目调试时,你首先需要打开python shell,再重新import每个model。如果安装了django-extensions, 使用python manage.py shell_plus命令将打开一个加强版的django shell,这个shell_plus为你自动载入项目中所有的model,可以让你很方便的开始调试。
show_urls
一句话可以展示当前项目所有定义的urls。
clear_cache
一句话清除缓存,在测试和开发环境很有用。
export_emails
一句话导出所有用户的email地址。
pipchecker
检查pip requirements.txt文件中是否有过期的packages,类似于pip list -o,只用于已安装过的packages。
其它有用的命令扩展还包括:
字段扩展
django-extensions提供的最有用的字段扩展莫过于AutoSlugField, RandomCharField和ShortUUIDField。
AutoSlugField
很多时候我们需要在url里根据模型某个或多个字段(比如标题,用户名)生成一个独一无二的slug,便于搜索引擎发现我们的内容。AutoSlugField可以很轻松帮我们完成这个任务,而且永不重复。比如两篇文章有同样的标题,它会在第2篇文章的slug结尾上加上一个数字。下次如果你用django开发自己的博客,试试这个字段吧,保证你满意。
使用这个字段时先从django-extensions导入,然后指定根据哪些字段生成slug即可。它的强大之处在于它还支持自定义的模型方法和双下划线__关联模型查询。
slug = AutoSlugField(populate_from=['title', 'get_description', 'author__username'])RandomCharField
验证用户身份时我们经常需要生成一个随机字符串发给用户,有时还需生成随机的邀请码。RandomCharField可以轻松实现这个目的。你还可以指定字符串长度和格式。
>>> RandomCharField(length=8, unique=True)BVm9GEaE>>> RandomCharField(length=4, include_alpha=False)7097>>> RandomCharField(length=12, include_punctuation=True)k[ZS.TR,0LHO>>> RandomCharField(length=12, lowercase=True, include_digits=False)pzolbemetmok
ShortUUIDField
一个由22个字符组成的字符串,比正常的uuid短了很多。尽管不保证唯一,但重复概率极低。
模型扩展
django-extensions提供的最有用的模型基类扩展莫过于ActivatorModel, TitleDescriptionModel, TimeStampedModel 和TitleSlugDescriptionModel。使用时把你的模型继承这几个基类即可。
ActivatorModel
作为基类提供了 status, activate_date,和 deactivate_date 这3个字段。status是一个choice选项,默认是activated。每次当你激活或失活一条记录时,日期会自动更新。它还提供了一个自定义Manager方法,允许使用Model.objects.active()查询所有处于活跃状态的对象。
TitleDescriptionModel
作为基类提供了title 和 description两个字段。title最长255个字符。
TimeStampedModel
作为基类提供了created 和 modified两个字段。这两个字段都是自我管理,自动更新的。
TitleSlugDescriptionModel
作为基类提供了title , description和 slug三个字段,其中slug根据title自动生成,独一无二。
所有以上扩展你最喜欢哪个呢? 欢迎留言。
大江狗原创
2020.12.15
转自:https://mp.weixin.qq.com/s/s8fEO9lDJ584aAVb6irLFQ
信号是一种通知或者说通信的方式,信号分为发送方和接收方。发送方发送一种信号,接收方收到信号的进程会跳入信号处理函数,执行完后再跳回原来的位置继续执行。
常见的 Linux 中的信号,通过键盘输入 Ctrl+C,就是发送给系统一个信号,告诉系统退出当前进程。
信号的特点就是发送端通知订阅者发生了什么。使用信号分为 3 步:定义信号,监听信号,发送信号。
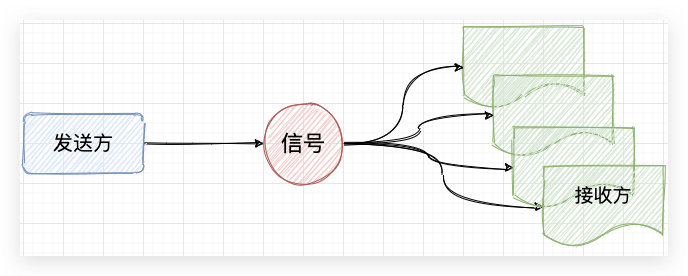
Python 中提供了信号概念的通信模块,就是blinker。
Blinker 是一个基于 Python 的强大的信号库,它既支持简单的点对点通信,也支持点对多点的组播。Flask 的信号机制就是基于它建立的。Blinker 的内核虽然小巧,但是功能却非常强大,它支持以下特性:
安装方法:
pip install blinker
from blinker import signal

# 定义一个信号
s = signal('king')


def animal(args):
    print('我是小钻风,大王回来了,我要去巡山')

# 信号注册一个接收者
s.connect(animal)

if "__main__" == __name__:
    # 发送信号
    s.send()

blinker 也支持匿名信号,就是不需要指定一个具体的信号值。创建的每一个匿名信号都是互相独立的。
from blinker import Signal

s = Signal()

def animal(sender):
    print('我是小钻风,大王回来了,我要去巡山')

s.connect(animal)

if "__main__" == __name__:
    s.send()
组播信号是比较能体现出信号优点的特征。多个接收者注册到信号上,发送者只需要发送一次就能传递信息到多个接收者。
from blinker import signal

s = signal('king')


def animal_one(args):
    print(f'我是小钻风,今天的口号是: {args}')

def animal_two(args):
    print(f'我是大钻风,今天的口号是: {args}')


s.connect(animal_one)
s.connect(animal_two)

if "__main__" == __name__:
    s.send('大王叫我来巡山,抓个和尚做晚餐!')

接受方支持订阅指定的主题,只有当指定的主题发送消息时才发送给接收方。这种方法很好的区分了不同的主题。
from blinker import signal

s = signal('king')


def animal(args):
    print(f'我是小钻风,{args} 是我大哥')

s.connect(animal, sender='大象')

if "__main__" == __name__:
    for i in ['狮子', '大象', '大鹏']:
        s.send(i)

除了可以函数注册之外还有更简单的信号注册方法,那就是装饰器。
from blinker import signal

s = signal('king')

@s.connect
def animal_one(args):
    print(f'我是小钻风,今天的口号是: {args}')

@s.connect
def animal_two(args):
    print(f'我是大钻风,今天的口号是: {args}')

if "__main__" == __name__:
    s.send('大王叫我来巡山,抓个和尚做晚餐!')
connect的注册方法用着装饰器时有一个弊端就是不能够订阅主题,所以有更高级的connect_via方法支持订阅主题。
from blinker import signal

s = signal('king')

@s.connect_via('大象')
def animal(args):
    print(f'我是小钻风,{args} 是我大哥')


if "__main__" == __name__:
    for i in ['狮子', '大象', '大鹏']:
        s.send(i)
如果对于一个发送者发送消息前要准备的耗时很长,为了避免没有接收者导致浪费性能的情况,所以可以先检查某一个信号是否有接收者,在确定有接收者的情况下才发送,做到精确。
from blinker import signal

s = signal('king')
q = signal('queue')


def animal(sender):
    print('我是小钻风,大王回来了,我要去巡山')

s.connect(animal)


if "__main__" == __name__:

    res = s.receivers
    print(res)
    if res:
        s.send()

    res = q.receivers
    print(res)
    if res:
        q.send()
    else:
        print("孩儿们都出去巡山了")
{4511880240: <weakref at 0x10d02ae80; to 'function' at 0x10cedd430 (animal)>}
我是小钻风,大王回来了,我要去巡山
{}
孩儿们都出去巡山了
也可以检查订阅者是否由某一个信号
from blinker import signal

s = signal('king')
q = signal('queue')


def animal(sender):
    print('我是小钻风,大王回来了,我要去巡山')

s.connect(animal)


if "__main__" == __name__:

    res = s.has_receivers_for(animal)
    print(res)

    res = q.has_receivers_for(animal)
    print(res)
True
False
Flask 集成 blinker 作为解耦应用的解决方案。在 Flask 中,信号的使用场景如:请求到来之前,请求结束之后。同时 Flask 也支持自定义信号。
from flask import Flask

app = Flask(__name__)

@app.route('/',methods=['GET','POST'],endpoint='index')
def index():
    return 'hello blinker'

if __name__ == '__main__':
    app.run()
访问127.0.0.1:5000时,返回给浏览器hello blinker。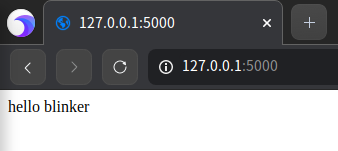
因为 Flask 集成了信号,所以在 Flask 中使用信号时从 Flask 中引入。
from flask import Flask
from flask.signals import _signals

app = Flask(__name__)

s = _signals.singal('msg')


def QQ(args):
    print('you have msg from QQ')

s.connect(QQ)

@app.route('/',methods=['GET','POST'],endpoint='index')
def index():
    s.send()
    return 'hello blinker'

if __name__ == '__main__':
    app.run()

在 Flask 中除了可以自定义信号,还可以使用自带信号。Flask 中自带的信号有很多种,具体如下:
请求
request_started = _signals.signal('request-started')                # 请求到来前执行
request_finished = _signals.signal('request-finished')              # 请求结束后执行

模板渲染
before_render_template = _signals.signal('before-render-template')  # 模板渲染前执行
template_rendered = _signals.signal('template-rendered')            # 模板渲染后执行

请求执行
got_request_exception = _signals.signal('got-request-exception')    # 请求执行出现异常时执行
request_tearing_down = _signals.signal('request-tearing-down')      # 请求执行完毕后自动执行(无论成功与否)
appcontext_tearing_down = _signals.signal('appcontext-tearing-down') # 请求上下文执行完毕后自动执行(无论成功与否)

请求上下文中
appcontext_pushed = _signals.signal('appcontext-pushed')            # 请求上下文push时执行
appcontext_popped = _signals.signal('appcontext-popped')            # 请求上下文pop时执行

message_flashed = _signals.signal('message-flashed')                # 调用flask在其中添加数据时,自动触发
下面以请求到来之前为例,看 Flask 中信号如何使用
from flask import Flask
from flask.signals import _signals, request_started
import time

app = Flask(__name__)

def wechat(args):
    print('you have msg from wechat')

# 从flask中引入已经定好的信号,注册一个函数
request_started.connect(wechat)

@app.route('/',methods=['GET','POST'],endpoint='index')
def index():
    return 'hello blinker'

if __name__ == '__main__':
    app.run()
当请求到来时,Flask 会经过request_started 通知接受方,就是函数wechat,这时wechat函数先执行,然后才返回结果给浏览器。
但这种使用方法并不是很地道,因为信号并不支持异步方法,所以通常在生产环境中信号的接收者都是配置异步执行的框架,如 Python 中大名鼎鼎的异步框架 celery。
信号的优点:
信号的缺点:
↓推荐关注↓
装饰器(decorator)是一种高级Python语法。可以对一个函数、方法或者类进行加工。在Python中,我们有多种方法对函数和类进行加工,相对于其它方式,装饰器语法简单,代码可读性高。因此,装饰器在Python项目中有广泛的应用。修饰器经常被用于有切面需求的场景,较为经典的有插入日志、性能测试、事务处理, Web权限校验, Cache等
装饰器的优点是能够抽离出大量函数中与函数功能本身无关的雷同代码并继续重用。即,可以将函数“修饰”为完全不同的行为,可以有效的将业务逻辑正交分解。概括的讲,装饰器的作用就是为已经存在的对象添加额外的功能。例如记录日志,需要对某些函数进行记录。笨的办法,每个函数加入代码,如果代码变了,就悲催了。装饰器的办法,定义一个专门日志记录的装饰器,对需要的函数进行装饰。

Python 的 Decorator在使用上和Java/C#的Annotation很相似,都是在方法名前面加一个@XXX注解来为这个方法装饰一些东西。但是,Java/C#的Annotation也很让人望而却步,在使用它之前你需要了解一堆Annotation的类库文档,让人感觉就是在学另外一门语言。而Python使用了一种相对于Decorator Pattern和Annotation来说非常优雅的方法,这种方法不需要你去掌握什么复杂的OO模型或是Annotation的各种类库规定,完全就是语言层面的玩法:一种函数式编程的技巧。
在Python中,装饰器实现是十分方便。原因是:函数可以被扔来扔去。
要理解装饰器,就必须先知道,在Python里,函数也是对象(functions are objects)。明白这一点非常重要,让我们通过一个例子来看看为什么。
def shout(word="yes"):

    **return** word.capitalize() + "!"

print(shout())

# outputs : 'Yes!'

# 作为一个对象,你可以像其他对象一样把函数赋值给其他变量

scream = shout

# 注意我们没有用括号:我们不是在调用函数,

# 而是把函数'shout'的值绑定到'scream'这个变量上

# 这也意味着你可以通过'scream'这个变量来调用'shout'函数

print(scream())

# outputs : 'Yes!'

# 不仅如此,这也还意味着你可以把原来的名字'shout'删掉,

# 而这个函数仍然可以通过'scream'来访问

del shout

**try**:

    print(shout())

**except** NameError as e:

    print(e)

    # outputs: "name 'shout' is not defined"

print(scream())

# outputs: 'Yes!'
Python 函数的另一个有趣的特性是,它们可以在另一个函数体内定义。
def talk():

    # 你可以在 'talk' 里动态的(on the fly)定义一个函数...

    **def** whisper(word="yes"):

        **return** word.lower() + "..."

    # ... 然后马上调用它!

    print(whisper())

# 每当调用'talk',都会定义一次'whisper',然后'whisper'在'talk'里被调用

talk()

# outputs:

# "yes..."

# 但是"whisper" 在 "talk"外并不存在:

**try**:

    print(whisper())

**except** NameError as e:

    print(e)

    # outputs : "name 'whisper' is not defined"
你刚刚已经知道了,Python的函数也是对象,因此:
那么,这样就意味着一个函数可以返回另一个函数:
def get_talk(type="shout"):

    # 我们先动态定义一些函数

    **def** shout(word="yes"):

        **return** word.capitalize() + "!"

    **def** whisper(word="yes"):

        **return** word.lower() + "..."

    # 然后返回其中一个

    **if** type == "shout":

        # 注意:我们是在返回函数对象,而不是调用函数,所以不要用到括号 "()"

        **return** shout

    **else**:

        **return** whisper

# 那你改如何使用d呢?

# 先把函数赋值给一个变量

talk = get_talk()

# 你可以发现 "talk" 其实是一个函数对象:

print(talk)

# outputs : <function shout at 0xb7ea817c>

# 这个对象就是 get_talk 函数返回的:

print(talk())

# outputs : Yes!

# 你甚至还可以直接这样使用:

print(get_talk("whisper")())

# outputs : yes...
既然可以返回一个函数,那么也就可以像参数一样传递:
def shout(word="yes"):

    **return** word.capitalize() + "!"

scream = shout

**def** do_something_before(func):

    print("I do something before then I call the function you gave me")

    print(func())

do_something_before(scream)

# outputs:

# I do something before then I call the function you gave me

# Yes!
现在已经具备了理解装饰器的所有基础知识了。装饰器也就是一种包装材料,它们可以让你在执行被装饰的函数之前或之后执行其他代码,而且不需要修改函数本身。
# 一个装饰器是一个需要另一个函数作为参数的函数

**def** my_shiny_new_decorator(a_function_to_decorate):

    # 在装饰器内部动态定义一个函数:wrapper(原意:包装纸).

    # 这个函数将被包装在原始函数的四周

    # 因此就可以在原始函数之前和之后执行一些代码.

    **def** the_wrapper_around_the_original_function():

        # 把想要在调用原始函数前运行的代码放这里

        print("Before the function runs")

        # 调用原始函数(需要带括号)

        a_function_to_decorate()

        # 把想要在调用原始函数后运行的代码放这里

        print("After the function runs")

    # 直到现在,"a_function_to_decorate"还没有执行过 (HAS NEVER BEEN EXECUTED).

    # 我们把刚刚创建的 wrapper 函数返回.

    # wrapper 函数包含了这个函数,还有一些需要提前后之后执行的代码,

    # 可以直接使用了(It's ready to use!)

    **return** the_wrapper_around_the_original_function

# Now imagine you create a function you don't want to ever touch again.

**def** a_stand_alone_function():

    print("I am a stand alone function, don't you dare modify me")

a_stand_alone_function()

# outputs: I am a stand alone function, don't you dare modify me

# 现在,你可以装饰一下来修改它的行为.

# 只要简单的把它传递给装饰器,后者能用任何你想要的代码动态的包装

# 而且返回一个可以直接使用的新函数:

a_stand_alone_function_decorated = my_shiny_new_decorator(a_stand_alone_function)

a_stand_alone_function_decorated()

# outputs:

# Before the function runs

# I am a stand alone function, don't you dare modify me

# After the function runs
我们用装饰器的语法来重写一下前面的例子:
# 一个装饰器是一个需要另一个函数作为参数的函数

**def** my_shiny_new_decorator(a_function_to_decorate):

    # 在装饰器内部动态定义一个函数:wrapper(原意:包装纸).

    # 这个函数将被包装在原始函数的四周

    # 因此就可以在原始函数之前和之后执行一些代码.

    **def** the_wrapper_around_the_original_function():

        # 把想要在调用原始函数前运行的代码放这里

        print("Before the function runs")

        # 调用原始函数(需要带括号)

        a_function_to_decorate()

        # 把想要在调用原始函数后运行的代码放这里

        print("After the function runs")

    # 直到现在,"a_function_to_decorate"还没有执行过 (HAS NEVER BEEN EXECUTED).

    # 我们把刚刚创建的 wrapper 函数返回.

    # wrapper 函数包含了这个函数,还有一些需要提前后之后执行的代码,

    # 可以直接使用了(It's ready to use!)

    **return** the_wrapper_around_the_original_function

@my_shiny_new_decorator

**def** another_stand_alone_function():

    print("Leave me alone")

another_stand_alone_function()

# outputs:

# Before the function runs

# Leave me alone

# After the function runs
是的,这就完了,就这么简单。@decorator 只是下面这条语句的简写(shortcut):
another_stand_alone_function = my_shiny_new_decorator(another_stand_alone_function)
装饰器语法糖其实就是装饰器模式的一个Python化的变体。为了方便开发,Python已经内置了好几种经典的设计模式,比如迭代器(iterators)。当然,你还可以堆积使用装饰器:
def bread(func):

    **def** wrapper():

        print("</''''''>")

        func()

        print("<______/>")

    **return** wrapper

**def** ingredients(func):

    **def** wrapper():

        print("#tomatoes#")

        func()

        print("~salad~")

    **return** wrapper

**def** sandwich(food="--ham--"):

    print(food)

sandwich()

# outputs: --ham--

sandwich = bread(ingredients(sandwich))

sandwich()

# outputs:

# </''''''>

# #tomatoes#

# --ham--

# ~salad~

# <______/>
用Python的装饰器语法表示:
def bread(func):

    **def** wrapper():

        print("</''''''>")

        func()

        print("<______/>")

    **return** wrapper

**def** ingredients(func):

    **def** wrapper():

        print("#tomatoes#")

        func()

        print("~salad~")

    **return** wrapper

@bread

@ingredients

**def** sandwich(food="--ham--"):

    print(food)

sandwich()

# outputs:

# </''''''>

# #tomatoes#

# --ham--

# ~salad~

# <______/>
装饰器放置的顺序也很重要:
def bread(func):

    **def** wrapper():

        print("</''''''>")

        func()

        print("<______/>")

    **return** wrapper

**def** ingredients(func):

    **def** wrapper():

        print("#tomatoes#")

        func()

        print("~salad~")

    **return** wrapper

@ingredients

@bread

**def** strange_sandwich(food="--ham--"):

    print(food)

strange_sandwich()

# outputs:

##tomatoes#

# </''''''>

# --ham--

# <______/>

# ~salad~
# 这不是什么黑色魔法(black magic),你只是必须让wrapper传递参数:

**def** a_decorator_passing_arguments(function_to_decorate):

    **def** a_wrapper_accepting_arguments(arg1, arg2):

        print("I got args! Look:", arg1, arg2)

        function_to_decorate(arg1, arg2)

    **return** a_wrapper_accepting_arguments

# 当你调用装饰器返回的函数式,你就在调用wrapper,而给wrapper的

# 参数传递将会让它把参数传递给要装饰的函数

@a_decorator_passing_arguments

**def** print_full_name(first_name, last_name):

    print("My name is", first_name, last_name)

print_full_name("Peter", "Venkman")

# outputs:

# I got args! Look: Peter Venkman

# My name is Peter Venkman
在上面的装饰器调用中,比如@decorator,该装饰器默认它后面的函数是唯一的参数。装饰器的语法允许我们调用decorator时,提供其它参数,比如@decorator(a)。这样,就为装饰器的编写和使用提供了更大的灵活性。
# a new wrapper layer

**def** pre_str(pre=''):

    # old decorator

    **def** decorator(F):

        **def** new_F(a, b):

            print(pre + " input", a, b)

            **return** F(a, b)

        **return** new_F

    **return** decorator

# get square sum

@pre_str('^_^')

**def** square_sum(a, b):

    **return** a ** 2 + b ** 2

# get square diff

@pre_str('T_T')

**def** square_diff(a, b):

    **return** a ** 2 - b ** 2

print(square_sum(3, 4))

print(square_diff(3, 4))

# outputs:

# ('^_^ input', 3, 4)

# 25

# ('T_T input', 3, 4)

# -7
上面的pre_str是允许参数的装饰器。它实际上是对原有装饰器的一个函数封装,并返回一个装饰器。我们可以将它理解为一个含有环境参量的闭包。当我们使用@pre_str(‘^_^’)调用的时候,Python能够发现这一层的封装,并把参数传递到装饰器的环境中。该调用相当于:
square_sum = pre_str('^_^') (square_sum)
Python的一个伟大之处在于:方法和函数几乎是一样的(methods and functions are really the same),除了方法的第一个参数应该是当前对象的引用(也就是 self)。这也就意味着只要记住把 self 考虑在内,你就可以用同样的方法给方法创建装饰器:
def method_friendly_decorator(method_to_decorate):

    **def** wrapper(self, lie):

        lie = lie - 3  # very friendly, decrease age even more :-)

        **return** method_to_decorate(self, lie)

    **return** wrapper

**class** Lucy(object):

    **def** __init__(self):

        self.age = 32

    @method_friendly_decorator

    **def** say_your_age(self, lie):

        print("I am %s, what did you think?" % (self.age + lie))

l = Lucy()

l.say_your_age(-3)

# outputs: I am 26, what did you think?
当然,如果你想编写一个非常通用的装饰器,可以用来装饰任意函数和方法,你就可以无视具体参数了,直接使用 *args, **kwargs 就行:
def a_decorator_passing_arbitrary_arguments(function_to_decorate):

    # The wrapper accepts any arguments

    **def** a_wrapper_accepting_arbitrary_arguments(*args, **kwargs):

        print("Do I have args?:")

        print(args)

        print(kwargs)

        # Then you unpack the arguments, here *args, **kwargs

        # If you are not familiar with unpacking, check:

        # http://www.saltycrane.com/blog/2008/01/how-to-use-args-and-kwargs-in-python/

        function_to_decorate(*args, **kwargs)

    **return** a_wrapper_accepting_arbitrary_arguments

@a_decorator_passing_arbitrary_arguments

**def** function_with_no_argument():

    print("Python is cool, no argument here.")

function_with_no_argument()

# outputs

# Do I have args?:

# ()

# {}

# Python is cool, no argument here.

@a_decorator_passing_arbitrary_arguments

**def** function_with_arguments(a, b, c):

    print(a, b, c)

function_with_arguments(1, 2, 3)

# outputs

# Do I have args?:

# (1, 2, 3)

# {}

# 1 2 3

@a_decorator_passing_arbitrary_arguments

**def** function_with_named_arguments(a, b, c, platypus="Why not ?"):

    print("Do %s, %s and %s like platypus? %s" % (a, b, c, platypus))

function_with_named_arguments("Bill", "Linus", "Steve", platypus="Indeed!")

# outputs

# Do I have args ? :

# ('Bill', 'Linus', 'Steve')

# {'platypus': 'Indeed!'}

# Do Bill, Linus and Steve like platypus? Indeed!

**class** Mary(object):

    **def** __init__(self):

        self.age = 31

    @a_decorator_passing_arbitrary_arguments

    **def** say_your_age(self, lie=-3):  # You can now add a default value

        print("I am %s, what did you think ?" % (self.age + lie))

m = Mary()

m.say_your_age()

# outputs

# Do I have args?:

# (<__main__.Mary object at 0xb7d303ac>,)

# {}

# I am 28, what did you think?
在上面的例子中,装饰器接收一个函数,并返回一个函数,从而起到加工函数的效果。在Python 2.6以后,装饰器被拓展到类。一个装饰器可以接收一个类,并返回一个类,从而起到加工类的效果。
def decorator(aClass):

    **class** newClass:

        **def** __init__(self, age):

            self.total_display = 0

            self.wrapped = aClass(age)

        **def** display(self):

            self.total_display += 1

            print("total display", self.total_display)

            self.wrapped.display()

    **return** newClass

@decorator

**class** Bird:

    **def** __init__(self, age):

        self.age = age

    **def** display(self):

        print("My age is", self.age)

eagleLord = Bird(5)

**for** i **in** range(3):

    eagleLord.display()
在decorator中,我们返回了一个新类newClass。在新类中,我们记录了原来类生成的对象(self.wrapped),并附加了新的属性total_display,用于记录调用display的次数。我们也同时更改了display方法。通过修改,我们的Bird类可以显示调用display的次数了。
Python中有三种我们经常会用到的装饰器, property、 staticmethod、 classmethod,他们有个共同点,都是作用于类方法之上。
property 装饰器用于类中的函数,使得我们可以像访问属性一样来获取一个函数的返回值。
class XiaoMing:

    first_name = '明'

    last_name = '小'

    @property

    **def** full_name(self):

        **return** self.last_name + self.first_name

xiaoming = XiaoMing()

print(xiaoming.full_name)
例子中我们像获取属性一样获取 full_name 方法的返回值,这就是用 property 装饰器的意义,既能像属性一样获取值,又可以在获取值的时候做一些操作。
staticmethod 装饰器同样是用于类中的方法,这表示这个方法将会是一个静态方法,意味着该方法可以直接被调用无需实例化,但同样意味着它没有 self 参数,也无法访问实例化后的对象。
class XiaoMing:

    @staticmethod

    **def** say_hello():

        print('同学你好')

XiaoMing.say_hello()

# 实例化调用也是同样的效果

# 有点多此一举

xiaoming = XiaoMing()

xiaoming.say_hello()
classmethod 依旧是用于类中的方法,这表示这个方法将会是一个类方法,意味着该方法可以直接被调用无需实例化,但同样意味着它没有 self 参数,也无法访问实例化后的对象。相对于 staticmethod 的区别在于它会接收一个指向类本身的 cls 参数。
class XiaoMing:

    name = '小明'

    @classmethod

    **def** say_hello(cls):

        print('同学你好, 我是' + cls.name)

        print(cls)

XiaoMing.say_hello()
一个函数不止有他的执行语句,还有着 name(函数名),doc (说明文档)等属性,我们之前的例子会导致这些属性改变。
def decorator(func):

    **def** wrapper(*args, **kwargs):

        """doc of wrapper"""

        print('123')

        **return** func(*args, **kwargs)

    **return** wrapper

@decorator

**def** say_hello():

    """doc of say hello"""

    print('同学你好')

print(say_hello.__name__)

print(say_hello.__doc__)
由于装饰器返回了 wrapper 函数替换掉了之前的 say_hello 函数,导致函数名,帮助文档变成了 wrapper 函数的了。解决这一问题的办法是通过 functools 模块下的 wraps 装饰器。
from functools import wraps

**def** decorator(func):

    @wraps(func)

    **def** wrapper(*args, **kwargs):

        """doc of wrapper"""

        print('123')

        **return** func(*args, **kwargs)

    **return** wrapper

@decorator

**def** say_hello():

    """doc of say hello"""

    print('同学你好')

print(say_hello.__name__)

print(say_hello.__doc__)
装饰器的核心作用是name binding。这种语法是Python多编程范式的又一个体现。大部分Python用户都不怎么需要定义装饰器,但有可能会使用装饰器。鉴于装饰器在Python项目中的广泛使用,了解这一语法是非常有益的。
常见错误:“装饰器”=“装饰器模式”
设计模式是一个在计算机世界里鼎鼎大名的词。假如你是一名 Java 程序员,而你一点设计模式都不懂,那么我打赌你找工作的面试过程一定会度过的相当艰难。
但写 Python 时,我们极少谈起“设计模式”。虽然 Python 也是一门支持面向对象的编程语言,但它的鸭子类型设计以及出色的动态特性决定了,大部分设计模式对我们来说并不是必需品。所以,很多 Python 程序员在工作很长一段时间后,可能并没有真正应用过几种设计模式。
不过装饰器模式(Decorator Pattern)是个例外。因为 Python 的“装饰器”和“装饰器模式”有着一模一样的名字,我不止一次听到有人把它们俩当成一回事,认为使用“装饰器”就是在实践“装饰器模式”。但事实上,它们是两个完全不同的东西。
“装饰器模式”是一个完全基于“面向对象”衍生出的编程手法。它拥有几个关键组成:一个统一的接口定义、若干个遵循该接口的类、类与类之间一层一层的包装。最终由它们共同形成一种“装饰”的效果。
而 Python 里的“装饰器”和“面向对象”没有任何直接联系,**它完全可以只是发生在函数和函数间的把戏。事实上,“装饰器”并没有提供某种无法替代的功能,它仅仅就是一颗“语法糖”而已。下面这段使用了装饰器的代码:
@log_time

@cache_result

**def** foo(): pass
基本完全等同于:
def foo(): pass

foo = log_time(cache_result(foo))
装饰器最大的功劳,在于让我们在某些特定场景时,可以写出更符合直觉、易于阅读的代码。它只是一颗“糖”,并不是某个面向对象领域的复杂编程模式。
参考链接:
作者:钱魏Way
https://baidubiaodianfu.com/python-decorator.html
大家好,我是帅东哥 。
。
平时大家可能总会看到各种炫酷的数学动画,却不知用什么制作的,本次给大家推荐一个可以制作数学动画的神器:manim。
manim是斯坦福大学数学系小哥Grant Sanderson开源的数学仿真模拟python库,并用于YouTube 频道3Blue1Brown,来解说高等数学。
manim是一个非常优秀的数学动画制作引擎,先来两个GIF感受一下 manim 的魅力: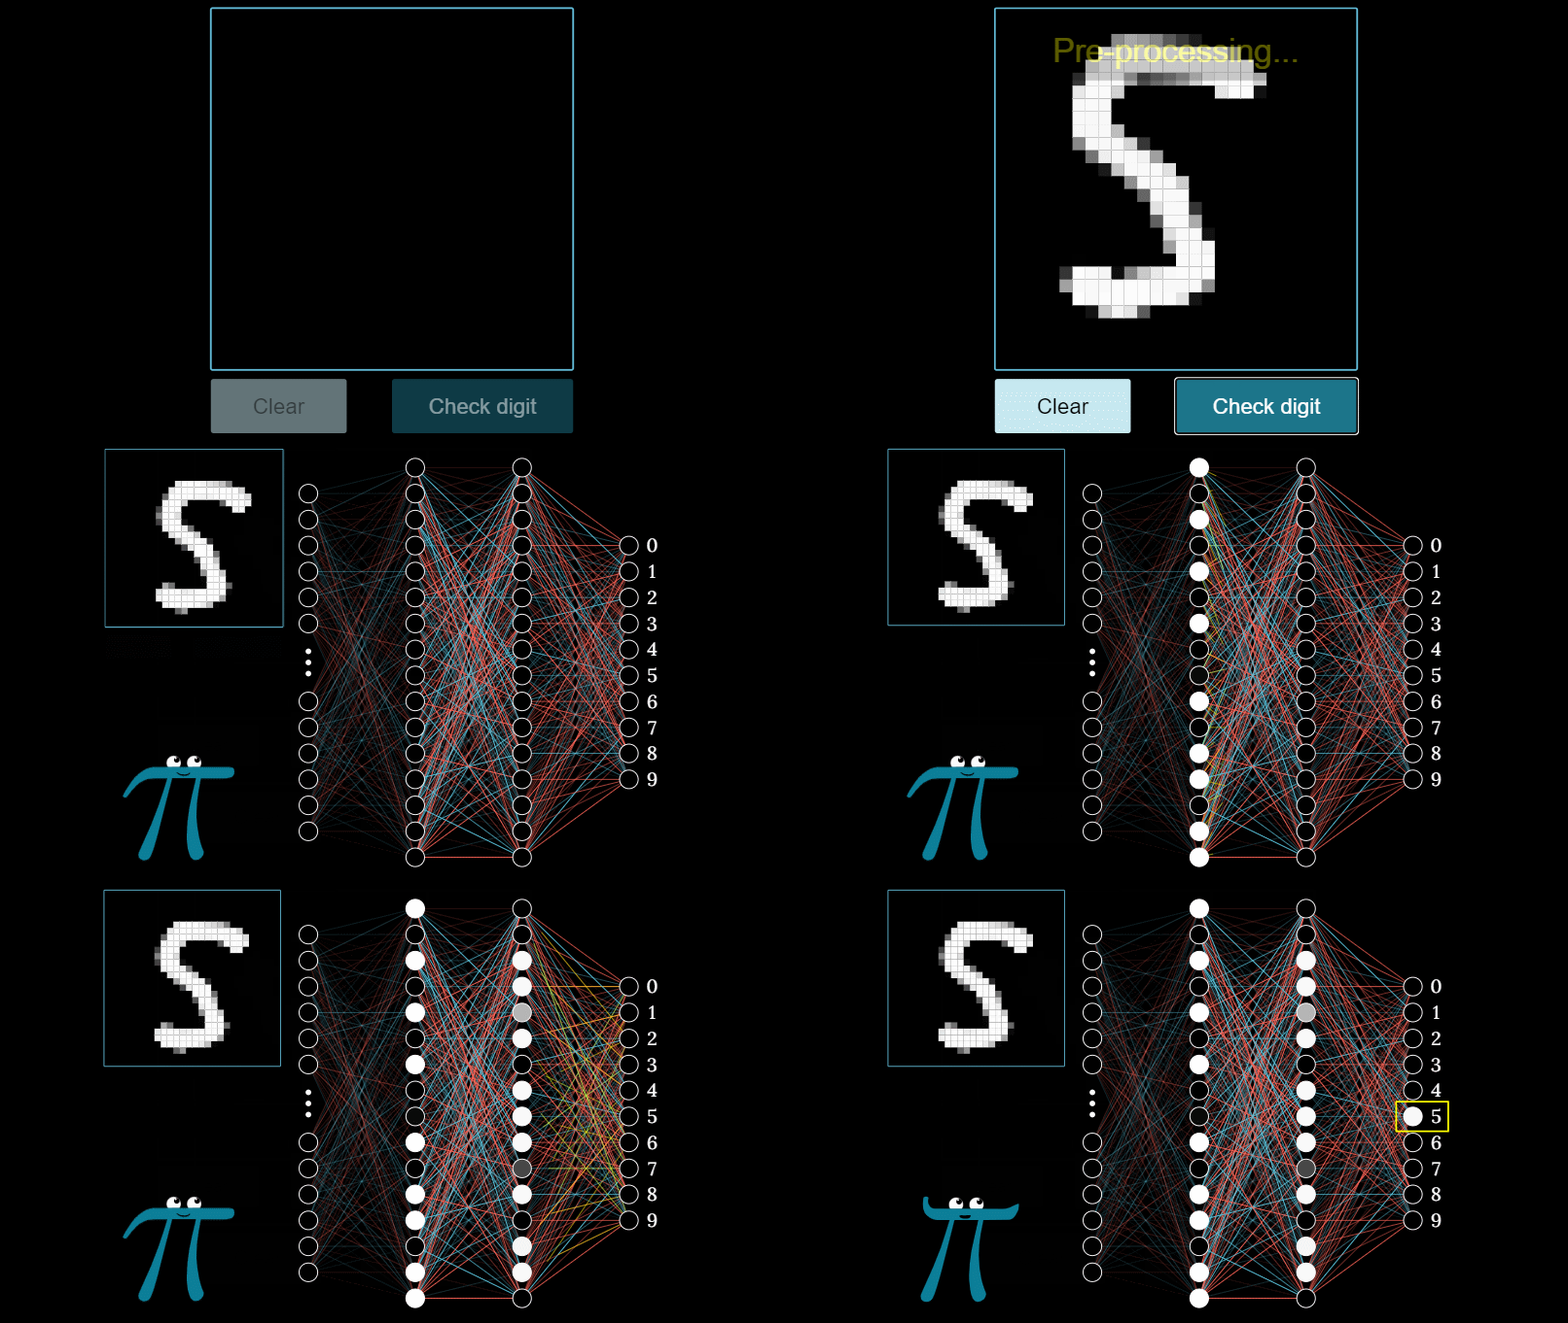
很多同学应该在 B 站看过3b1b的视频,最经典的就是线性代数的本质系列。
manim 初学者可能会有些许困惑,网上的代码、文档、教程等差异太大,不知道该跟着那个学习。
目前manim有三个版本:
3b1b 旧版:3blue1brown 自己维护的版本,使用 Cairo 作为后端。
3b1b 新版:3blue1brown 自己维护的版本,使用 OpenGL 和 moderngl 来进行 GPU 渲染,优点是速度快。
manim 社区版:manim 旧版的衍生,更新更活跃,有很好的文档和社区支持。
我直接学习了新版。
manimgl 这个版本的安装特别简单
1、安装配置FFmpeg和LaTex
https://ffmpeg.org/download.html
FFmpeg,下载安装即可,把安装路径添加到环境变量即可
https://mirror.ctan.org/systems/texlive/tlnet/install-tl-windows.exe LaTex更简单,一路下一步即可。
2、创建虚拟环境
conda create -n manim python=3.8
conda activate manim
3、安装manimgl包
pip install manimgl
也可以clone最新的源码进行安装
git clone https://github.com/3b1b/manim.git
cd manim
pip install -e .
这样还能测试一下是否安装成功了。
manimgl example_scenes.py OpeningManimExample
官方文档:
https://3b1b.github.io/manim
中文文档:
https://docs.manim.org.cn/
3b1b 视频源码:
https://github.com/3b1b/videos
manim 源码:
https://github.com/3b1b/manim
可以先看中/英文文档,然后就动手制作自己的动画。有空可以看看3b1b的视频(结合源码),如另有余力,如果能为manim贡献代码就更好了。

最近在youtube上看到了一个用 manim 制作了数据结构与算法的视频,就挺强的。
 视频源码:https://github.com/nipunramk/Reducible